Thursday, February 27, 2014

Bye Bye February

This month I've been a guest blogger over on And Then We Set it on Fire a few times, and have been doing a lot of dyeing related to the Ann Johnston DVD.

Here are three fat quarter pieces that I dyed Turquoise (for a Fire blog post), then I batiked with an egg carton dipped in beeswax, and overdyed.
I like how they turned out, and I think they'll make some cute pillows.
And I also finished up a crib bumper set for my daughter who is having a baby in April, this time a boy.  Got this whole set in the mail to her today.
What a mess! I had to get these out of the way because I just don't have enough room...
 And for two Saturdays in a row, I went to a quilt-as-you-go class at my LQS, Quilting Quest in Lexington.  I had some blocks made already, so I used them to learn the technique of joining the already-quilted squares.  Very easy, and I'll definitely use this again, probably to make a baby blanket soon!

Monday, February 17, 2014

Real Snow for Snow Dyeing!

Last Wednesday & Thursday we had about 8" of snow (and some ice/sleet) where I live in North Carolina, which is extremely rare.  Ok, there aren't any snowplows to speak of, and the schools all close in anticipation of storms, and so I was lucky enough to have Wednesday through Friday off of work.

So, on Friday, after the snow stopped falling, I did some snow dyeing.  I used blue, turquoise, and some yellow orange.
 For these pieces, I poured liquid dye concentrates onto the snow.  Purple, orange, and yellow.
Then I tried a couple using the dye powders instead--I think this was Sapphire and Blue Violet.  
I used Avacado & chartreuse dye powders for this.  The yellows in this piece below didn't melt down very well, they turned a little "gooey" instead.  I didn't take a picture of the finished version, but I ended up overdyeing it on Sunday since I wasn't 100% happy with the results.
Here are some of my results from Friday.  (The piece on the right is from the bottom of the tray that soaked up the leftover drops).
 I think this is my favorite:
So, on Sunday morning I realized there was still some snow out there, so I took a few more pieces and put them in soda solution, then poured on the dye concentrates.  This time I went with summery pastels.
This piece below was the green/chartreuse one that I didn't take a previous picture of, but once I overdyed it, I love it.
What a nice way to spend an unexpected "mini-vacation"!

Friday, February 7, 2014

First Friday in February

More low water immersion (LWI) dyeing experimentation- 

These pieces were dyed in small bins, all scrunched up, using the same two colors (Chinese Red and Warm Yellow).  The darker one was dyed using a stronger solution, the lighter one was watered down (sorry, no exact measurements).

Same with these two pieces, they were both dyed with Boysenberry and Intense Blue, at different strengths.

And I used the boysenberry/intense blue pieces with some ice-dyed fabric I already had.  Using a similar color pallet when dyeing is great--all your fabric is from the same (or similar) color families.


This quilt top only took about a day to sew together.  Adding it to the pile of UFOs ready to be quilted....

More dyeing, this time using the Parfait Method.  Read more about how I did it on And Then We Start it on Fire.

Linking up with Off The Wall Fridays today!

Thursday, February 6, 2014

A Dyeing History

I admit that I love to dye fabric.  I would dye fabric all day long if I didn’t have to go to my job Monday through Friday.  I also admit that it doesn’t always come out the way I had planned, hoped, or expected it to!  But I am learning a lot all the time about dyes and the way they react with each other.

One of the first things I learned is that everyone dyes their fabric in their own way, and most of those folks tend to think their way is THE BEST.   I don’t live near anyone else who dyes fabric, so I had to learn from books—these are my favorites: 


Book 1 – Dyeing to Quilt by Joyce Mori - It’s absolutely fantastic for taking you through dyeing color wheels using three primary colors.  Simple, clear instructions, just what a beginner needs!  It’s out of print now but available used on-line.


Book 2 – Color Your Cloth by Malka Dubrawsky - A great resource for a beginner—the directions are very clear, and she also describes in great detail how to do batik and also discharge.  Great if you want to create patterns on cloth, as well as try out some fun techniques.   


Book 3 – Fabric to Dye For by Frieda Anderson - She uses some key colors to create her cloth, and shows how to make gradients and other specialized fabrics.


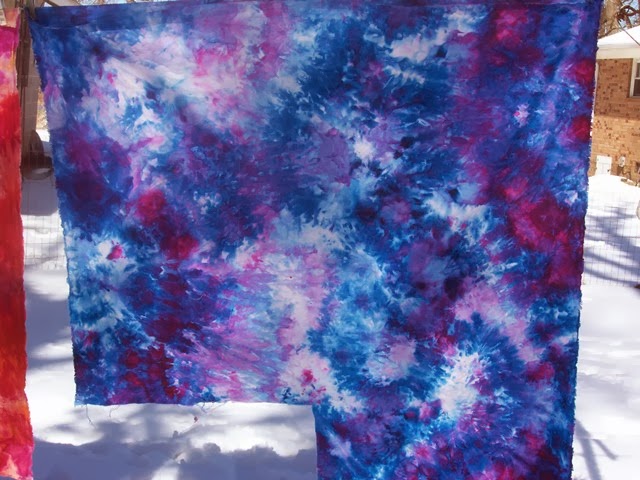
So I tried dyeing and made some great fabrics that I was happy with.  Then I needed a specific purple color, and couldn’t figure out how to get it.  I signed up for an on-line dyeing course taught by Candy Glendening at Candied Fabrics, 
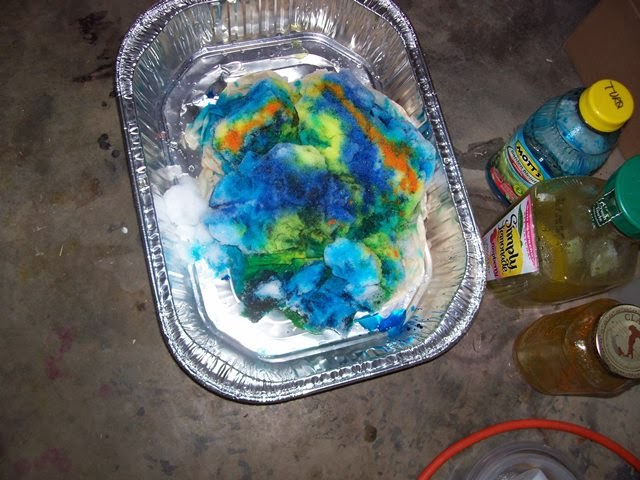
http://dyeing101.candiedfabrics.com/  where we learned to dye these “Tables” using 3 different primary colors and the low water immersion technique:


It was kind of tedious at times, measuring out tiny amounts of dye through a syringe, and creating over 120 swatches.  We did a warm color set and a cool color set, and this class helped me SO much -- one of the things with dyeing is that there are so many different dye colors, and it gets expensive trying to buy all of them, so why not learn to mix your own colors, and technically you can dye any color using a combination of Red, Yellow, Blue, and black.  

I can definitely recommend this class to anyone who wants more control over their dyeing results—and it wasn’t expensive, especially when compared to attending a 3-5 day workshop in another state.  A very economical choice, and great for someone who hasn’t dyed before and wants to try it out, as well as someone who has started to dye but isn’t always thrilled with the results.


When you get REALLY serious about dyeing fabric, the more you learn makes you realize how much more there is to learn.   Recently, I bought Ann Johnston’s DVDs Color by Accident, a set has well over 4 hours of information on them, and it’s almost like being at a workshop.  The techniques are being covered during February over at And Then We Set It On Fire, check them out!