Friday, December 28, 2012

Final FM Challenge

Hard to believe that this is the final challenge--it's been a great year's worth of designs, projects, techniques, and lots of practice.  For this final challenge, I decided to do a combination of the bonus tutorial presented by Teri Lucas, along with the monthly December challenge presented by Patsy Thompson.
I don't have a printer at home, so I used my printer at work -- I ironed some Kona white cotton on some freezer paper, then ran it through a color copier, which printed out so lightly that I couldn't use it.  So I decided to try it on my B&W printer, and this is what I ended up with.  Since I did this last week, before taking almost two weeks off, I didn't have any other options at the time, but I really kind of like it.
I used a dark charcoal grey background, some Aurifil white thread in the star, some Aurifil grey on the background, and some black Madiera thread in the area right around the star.
I did freeform feathers around the outside, which I love to do.
  
 Another fun month, so sad to see it end.  Thanks, SewCalGal!


Friday, December 7, 2012

Dyeing Wool and Getting Sidetracked

I seem to get sidetracked so easily--my "plan" was to finish up all my UFOs before the end of the year and start fresh for next year...but I had some wool felt that I bought at Joann's Fabrics a long time ago, and it was just a plain off-white color.  Since Procion MX dyes don't work on wool, and I really didn't want to spend a bunch of money on a whole new line of acid dyes, I learned from some on-line research that I could use Wilton icing colors (concentrated gel) and mix with Fruit Fresh (ascorbic acid) and dye wool with it.   I used my Joann's coupon and got the gel colors there, and already had the fruit fresh because I can pears and peaches every summer.

I took two small pieces of the wool felt, and cut shapes like circles and ovals in one which I then dyed with a combination of blues/greens/purples using the icing gel and Fruit Fresh combo.  The other one I left whole and dyed orange.  (If I do this again, I'll leave the pieces whole and dye first, then cut out the shapes--I don't know why I did it the way I did--now I have a bunch of white ovals and circles that I'm going to have to dye to use.)  I mixed the gel in some water, then added the Fruit Fresh and dipped the wool into it--the colors were very bright, and I was surprised at how quickly the wool grabbed the color.

Anyway, it took over 3 days for these to dry, but they were finally dry last night.  So I took my hand needle felter and punched away on this piece, joining them into one piece.  It was slow and tedious, and not very stimulating.  Having an embellishing machine would definitely be better!
I want to do some free motion quilting and other stitching on this piece, I think it will be fun.  If anyone reading this has a felting/embellishing machine, I'd be interested in hearing about them.

So that's my experiment for the week, hope someone will read this and decide to try it for themselves.
And I also finished up my Christmas tree from last week and mailed it to my sister, who received it yesterday.  Linking up with Off-The-Wall Friday today, check out the wonderful projects there! 

Monday, December 3, 2012

Winners!

Winners--brought to you by the letter "J"!  Judith (of Quilt or Dye) and Johanna!
I used the scientific method of writing names on little scraps of paper, then folding and mixing them up really well.  Judith will get the Paper & Metal Lamination book, and Johanna will get the Making Your Mark book.  Please send me your home addresses, ladies, so I can get these in the mail ASAP.  
Merry Christmas!

(This is the first giveaway I've ever had and I feel really bad for everyone who didn't win, because I know just how you feel).

Friday, November 30, 2012

Feeling the Christmas Spirit yet? How about a giveaway!

Not too much Christmas spirit here yet, this is the first "Christmas-ey" thing I've even considered making this year.  On Thanksgiving, my sister Donna asked me to make a "traditional" wall hanging of a tree, so here it is.  Just have to cut some binding tonight after work and sew it on by machine.
Hope that's traditional enough!  The quilting, which I did last night, shows up better in this picture:
 Donna, if you read this, let me know if this is what you had in mind!

I've also been working on finishing up some of those UFOs before the year ends.  This poor thing has been on my design wall forever, just waiting to be trimmed and bound.  
It started as a drop cloth under some painting/dyeing I was doing in my garage.
The hand stitching turned out nicely, I think, and so did the machine stitching.
Maybe a giveaway will help get me in the Christmas Spirit!  Last September I ordered two books from Interweave, and waited and waited and waited for them to arrive.  After about 3 weeks, I contacted Interweave and they told me the books hadn't even shipped yet!  I cancelled the order with Interweave right then, ordered the books from Dharma's website (where they were cheaper), and they both arrived with in 2 days.  

So, last week, the book order that I had cancelled over a month ago FINALLY arrived at my house--when I contacted Interweave, they said I might as well keep them--so I'm giving them away to someone out there!

Making Your Mark by Claire Benn & Leslie Morgan
Making Your Mark: Creating Cloth for Imagery, Stitch, Embroidery & Embellishment

Paper & Metal Leaf Lamination by Claire Benn & Leslie Morgan

Please leave a comment, and I'll pick one winner randomly for each of these books next Monday, December 3rd.  If you'd prefer one book over the other, please note that in your comments and I'll try to accommodate your wishes.  Due to shipping costs, I'm going to have to restrict this to US residents only.  


Monday, November 19, 2012

FM Challenge for November

Got this challenge done over the weekend, I was making a quilt for a great-nephew and used the swirl techniques from the SewCalGal challenge on it to get both of them taken care of.

I did the larger swirls around the outside border on the sides.
 I added a striped border on the top and bottom of the quilt so it wasn't a square, then I quilted some small swirls in the white part of the stripes.  Since the quilt is for a baby boy, I didn't want to add too many swirls--would they make it look too feminine? 
I tried to make them look more like waves than swirls!
 I did take a photo of the whole finished quilt, but it wasn't in focus.
This month's challenge was easy, I've been doing swirls in my quilting for a while now and really enjoy making all kinds of them.  
One more month to go in the challenge. 

Friday, November 9, 2012

Another crazy week OVER

Lately I've been living for Fridays -- work is hectic and the days are long, and I don't feel like doing much when I get home at 5:30 p.m!  And there was so much emotion and electricity in the air this week with the presidential election (positive and negative)--it has been so wonderful not to have those awful political ads running constantly on the TV anymore.

This is something I started last Sunday (technique is from the on-line DMTV workshops that I signed up for).  I took a piece of hand dyed fabric and cut out some freezer paper templates of trees, ironed them on, and applied some deColourant to the spaces in between the trees.  Then you have to iron it, and wash it.

This is how it looked after peeling off the freezer paper trees and washing in the washing machine:  
Not crazy about it, but it might look better after quilting it heavily and adding some decorative stitching.  The back actually looks better, as there isn't the severe contrast in color.  Hmmm... This technique was pretty easy, and I would like to try it again with some deColourant that puts a color back in after taking the original color out.
I can't attend any "real" workshops due to the cost, along with not getting enough time off work, so the virtual ones will have to suffice right now.  Linda and Laura Kemshall have tons of videos on their DMTV website, and it's not that expensive to sign up, when compared to the cost of attending a "real" workshop.  You can get access for 3 months, 6 months, or a year, and they post new projects all the time.

I'm also working on a Christmas gift, a traditional little boy quilt for a great-nephew. 

And another quilt top that has been a UFO for way too long--I added a 10" wide border and have the backing fabric all ready to go.  Hope to baste it and start quilting SOON.

Friday, October 26, 2012

TGIF

I spent last weekend piecing a quilt and finally got all the squares sewn together.  It was so easy!  First you sew some strips of fabric together, in widths of around 5" to 10", depending on the intended finished size of your blocks.  I was going with 12" finished blocks, so I made about 5 or 6 sets of strips of 2 different fabrics for each.  The strips measured about 14" wide x 42" long when I was done.  The widths of the fabrics used to make the strips were around 5-7" or so.

Then I took a ruler and placed the 60 degree line on the left side of the strip and cut some 60 degree angles.  Then I added another piece to make a roughly shaped square. 

Here are my "squares" taped up on the wall so I could get an idea what they were going to look like all together before trimming them:
I then trimmed each of these down into a 12" square, using my 12" square ruler, and then sliced each of the squares in half, making triangles, which I then shuffled and sewed back into squares.
The squares were then placed on point, and sewn together in a design that I was happy with.  This wasn't my idea, it came from an American Quilter Magazine (August 2012?) and was designed by Marcia DeCamp.  Next time I'm going to make one with bigger squares, maybe 16", if only to use up some of the piles of hand-dyed fabrics I have on hand. 
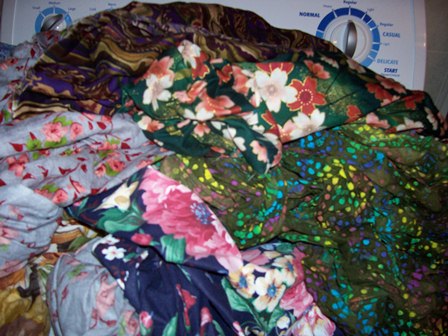
The only fabric that is 100% commercial is the orange swirley fabric, the rest is stuff I've made or other commercial fabric that I've overdyed to make it a color that I actually would use. 
This is going to be quilted this weekend, can't wait for two whole days that I can stay home and spend time quilting.   Also on my calendar is another quilt top that I've had in a UFO pile for a year now!  It is very simple, just needs to be quilted to make it look great.
I love having lots of solid space to do lots of fun, mindless quilting on.
This is a picture of part of the pieced back--the darker fabric on the left was formerly a 2 yard piece with big cream colored magnolia-like flowers on an orange/brown background.  I overdyed it in some orange and blue to make a warm brown, and it looks perfect for this project now.  It was a piece of fabric that I knew I'd never use, but it was too big just to give away or just have it sit there on my fabric shelf forever.

I won two DVDs this week (!), from Beth at SewSewArt who is celebrating her 3rd anniversary of blogging. One DVD is on Felting, the other is by Carol Taylor on Art Quilt Design. I don't have any quilting DVDs, so this will be a new thing for me!

Here in Central North Carolina, we're not supposed to be feeling the effects of Hurricane Sandy, except that it's supposed to cool down a bit and finally feel like fall.  I have family on the NC Coast, some up near New York City, some in Pennsylvania, and one in Florida, all places that are going to be affected by this storm.  Hope it isn't as bad as those weather people on TV make it out to be! 

Yikes, I forgot to link up with Nina Marie Sayre on her blog, it's Friday, and Off the Wall.

Monday, October 22, 2012

October FM Challenge Done

I enjoyed this month's challenge from SewCalGal--it was presented by Teri Lucas, and was a lot of fun to stitch. 
I used a satiny piece of fabric that I've had for years, and some YLI Silk thread.  Turns out they were both the same color, but since it was the only silk thread I had, I decided to use it.  It was a little difficult to see the stitching once in a while, but it was a bright & sunny day yesterday when I worked on it which made it a little easier. 
The shiny fabric really looks great when stitched up. 
I added my name like we were supposed to do, but as a little feature on the side, not as a main feature.
I think this is the back.
Joan at Leschenault was nice enough to create a video to show me how she made her nautilus shells.  (Her stitching is already good enough that she should be teaching one of these monthly challenges, in my opinion).  My shells didn't turn out great, but they're ok for a first attempt, and I definitely liked doing them, so I'll be doing more in the future, that's for sure.  Thanks, Joan!

I also finally sewed these blocks together from my Judy Niemeyer pattern, Raindrops.  Now to get it ready for quilting, what a job that's going to be!
It's so big that it dragged on the ground when I hung it on the clothesline to photograph. 
And I also started (and finished) this quilt top over the weekend.  It was a pattern I found in American Quilter's magazine, by Marcia DeCamp.  It's really easy, and has enough of a structured look but still looks contemporary.  I used up a bunch of my hand-dyed and batiked pieces that I've made over the last year or so. 
I think I'm going to make another one of these, still have lots of hand dyes and batiked fabrics to use up.  All in all, it was a very productive weekend.

Friday, October 19, 2012

Some good results, some not so good

Last weekend I took a bunch of older fabric--some that I had inherited when my mother died, and washed it all, then overdyed with dark colors so I can use them for quilt backs.  Some of the pieces are at least 2 yards, so I didn't want to waste it, but I knew I'd never use them "as is".
No pictures of the finished pieces, but now they are dark brown, navy blue, and a deep purple color. 

And I made up some sodium alginate resist paste, and used this plastic sink protector to "smoosh" the paste through, then let it dry.  It took almost 3 days for it to dry, probably because it's been kind of humid here. 

 
 When it finally dried, I used some of the sodium alginate paste and added tangerine dye and soda ash to it, covered with plastic and left it overnight.  This is what I ended up with in the morning after rinsing-- 

Also, I took a silkscreen that I had made last year, and added stripes to it with blue painter's tape.  Then I took more SA paste, added color to it, and used the thickened dye mixture to print with.
This is how it turned out on a previously painted piece I had. The color seems to have faded out, I think because I soaked it in soda ash before printing, and maybe the soda ash is too caustic for the paint?
This was done on a white piece of fabric that was first soaked with soda ash, then overdyed with grape colored dye.  The colors are a lot more vibrant. 
I used another screen to make a "squares" design, then over dyed it with either chartreuse or green, I can't remember now.  I'm really not sure how all of this red appeared on my finished piece, I wasn't even using anything with red in it that day!
So I have lots of usable fabric now, some large pieces for backings that I hope to get basted this weekend, some smaller pieces for another quilt I want to get working on, and some other pieces that will have to be re-dyed because they didn't turn out so well.  Working full-time just interrupts what I really want to be doing...

Friday, October 12, 2012

Raindrops Quilt

The only thing I've been working on this week is this Judy Niemeyer pattern, Raindrops, and I'm determined that I'm sewing all the blocks together this weekend and getting it ready for quilting!  The evenings after work seem to be getting shorter and shorter now, making me feel a lot less productive.
This is a great pattern, her paper piecing techniques make it really easy.  I finished up all the NY beauty blocks quite a few months ago, then put it aside.  Not sure why, maybe I was just tired of it at that point.  It was A LOT of sewing, flipping and cutting to get through.  
Now I finally have the blocks connected vertically, and am working on sewing the rows together into one big quilt top.  This will be fun to quilt, but sure do wish I had a long arm machine! 
I'm linking up to Off the Wall Fridays, check out Nina Marie's blog!